
Parts
Positioning
Part positioning controls where a part sits inside the project item in 3D space.
Every part has an X, Y, and Z position. The tricky part is that those values can work in two different ways:
- Relative positioning
- Absolute positioning
Most parts start in relative positioning, which is the easier and more automatic mode.
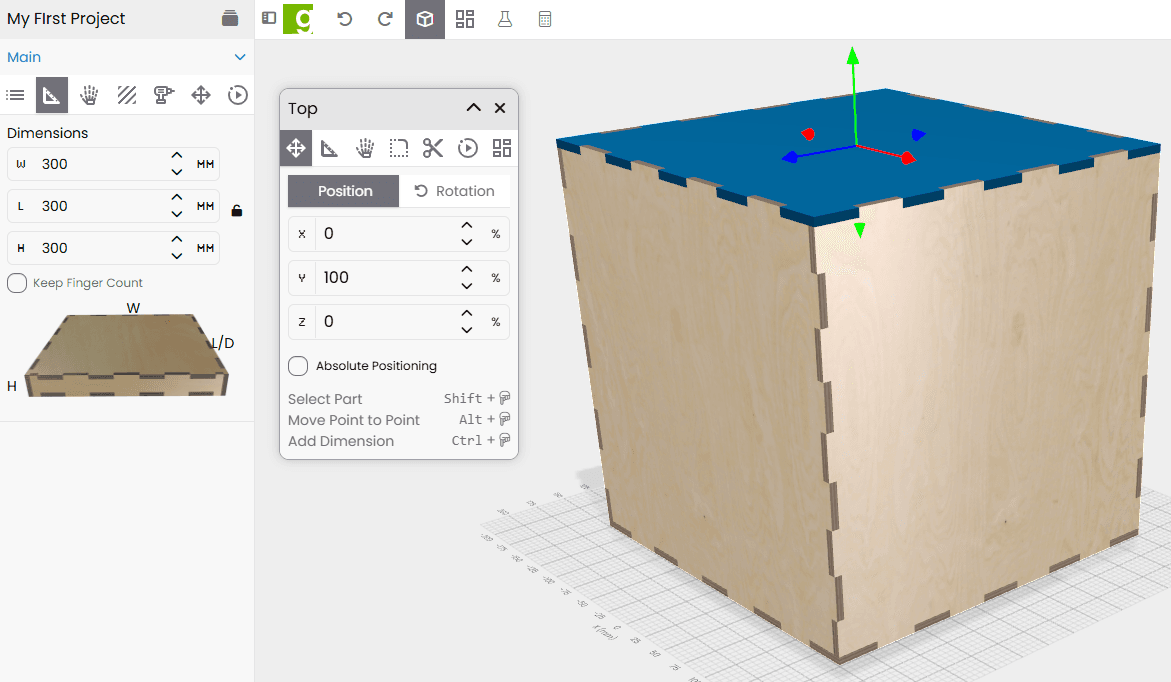
Relative Positioning
Relative positioning means the part is placed based on the size of the project item.
This is the default for generated parts. When you create a new box, the top, bottom, left, right, front, and back parts are positioned automatically so they form the correct shape.
Think of relative positioning as easy mode.
For example:
- The top is placed at
Y = 100% - The bottom is placed at
Y = 0 - The left side is placed at
X = -100% - The right side is placed at
X = 100%
The 100% value is based around the center of the part, with material thickness accounted for so the part lands where it should.
Why Relative Positioning Is Useful
Relative positioning keeps parts connected to the project item’s overall size.
If you change the project item dimensions or material thickness, GCrafter recalculates where the part should be.
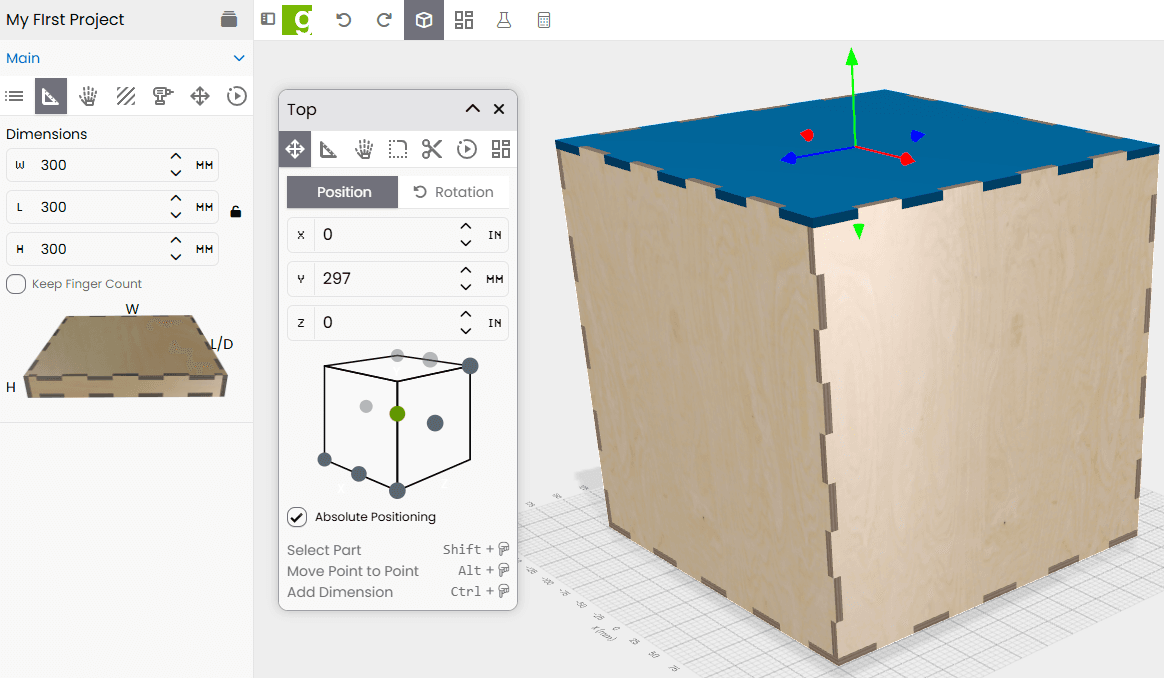
For example, imagine a box that is:
300mm Length: 300mm Height: 300mm Material thickness: 6mm
If the top part is set to:
Y = 100%
the center of that top part is positioned at about:
Y = 297mm
That puts the outer top face at:
Y = 300mm
So even though the field says 100%, GCrafter is accounting for the part’s thickness and placing the top where it belongs.
Another example:
X = 0
means the part is centered left to right.
X = 50%
moves the part halfway toward the right side, placing it about three-quarters across the project item width.
Relative Parts Move With the Project Item
In relative mode, parts move when the project item changes size.
That is usually what you want for box-style assemblies. If the box gets wider, the left and right sides stay on the outside. If the box gets taller, the top stays at the top.
You can turn relative positioning on or off for individual parts.
You can also switch all parts in a project item using:
- Parts to Absolute Position
- Parts to Relative Position
These options are available in the Project Item Parts Menu.
Absolute Positioning
Absolute positioning means the X, Y, and Z values are exact positions.
Instead of saying “put this part at the top of the item,” you are saying “put this part exactly here.”
This gives you more control, but it also requires more care.
Once you start working with exact 3D positions, things can get a little more complicated. A part may have thickness, curves, cutouts, finger joints, rounded corners, or other geometry that makes “line this up exactly” less obvious than it sounds.
This is where metric units can make life easier. Small decimal measurements are often simpler to reason about in millimeters than in fractions of an inch.
Choosing the Position Reference Point
When a part is set to absolute positioning, GCrafter lets you choose which point on the part is used as the position reference.
By default, the center of the part is used.
You will see a small cube with selectable points. These points represent different reference locations on the part.
Examples include:
- Left / top / back
- Center / top / back
- Right / top / back
- Left / center / center
- Center / center / center
- Right / center / center
- Left / bottom / front
- Center / bottom / front
- Right / bottom / front
Click one of the small circles on the cube to choose the reference point.
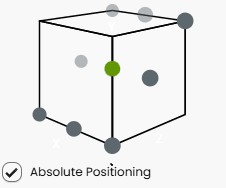
Keep in mind that this cube is shown from the perspective of looking at the project from the front center, facing the Z+ direction.
Matching One Part to Another
Absolute positioning is useful when you want one part to line up with another part.
For example, say you want a left part to mirror or match a right part across the project.
You might:
- Select the right-side part.
- Choose its right-center-center reference point.
- Copy the X position.
- Select the left-side part.
- Choose its left-center-center reference point.
- Paste the value.
The important detail is that matching mirrored parts often means matching opposite faces.
The right face of the right part may line up with the left face of the left part.
So do not always copy center-to-center. Choose the reference point that represents the face, edge, or corner you actually want to align.
Moving Parts by Points in the 3D View
If you are patient and do not mind hunting for exact points, there is another way to move parts visually.
With a part selected in the 3D view:
- Press and hold Alt.
- Move your cursor over the model.
- GCrafter will highlight points under the cursor, usually corners, edges, or other useful model points.

- Click the point you want to move from.
- Move to the point you want to move to.
- An arrow line will guide the movement.

- Press Alt and click the destination point.
The part will move so the selected starting point lands on the selected destination point.
These highlighted points are based on model vertices. A vertex is basically a point in the geometry, often found at corners, finger joints, and edges.
You do not need to memorize that. Just think of them as “snappable points on the model.”
Dragging With Axis Arrows
When you are in position mode, you will also see three colored axis arrows.

These let you drag the part along an axis:
- Red for X
- Green for Y
- Blue for Z
Click and drag an arrow to move the part along that direction.
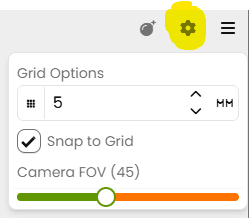
The movement follows your snap settings. For example, if snap is set to:
1mm
then dragging moves the part in 1mm increments.
This is useful for quick visual adjustments when typing exact coordinates would be slower.
When to Use Each Mode
Use relative positioning when the part should stay connected to the project item’s overall size.
Good examples:
- Box tops
- Bottoms
- Side walls
- Drawer panels
- Parts that should move automatically when the item is resized
Use absolute positioning when you need exact placement.
Good examples:
- Custom dividers
- Internal supports
- Decorative panels
- Parts aligned to a specific edge or corner
- Parts that should not move automatically when the project item changes size
The Main Idea
Relative positioning is flexible and automatic.
Absolute positioning is precise and manual.
If you are building a normal box or drawer, relative positioning usually does the right thing. If you are customizing a more complex assembly, absolute positioning gives you the control to place parts exactly where you want them.