
Parts
Rotation
Rotation lets you angle a part in 3D space.
On the surface, this sounds simple: choose an axis, enter a value, and the part rotates. Visually, that part is true. The challenge is what happens after rotation, especially when the part still needs to intersect with other parts and create usable finger joints.
Rotation Is Easy. Rotated Joinery Is Not.
A flat part with no joinery is fairly easy to rotate.
A thick part with finger joints is much harder.
When a part is angled, GCrafter has to account for the thickness of the material and how that angled part passes through or meets another part. Since your CNC, laser, or saw workflow is usually cutting flat profiles, the resulting openings may need extra clearance to fit the angled part.
That means rotated intersections can sometimes look unusual.
The part is not just tilted as a paper-thin surface. It has thickness. Because of that thickness, the receiving cut may need to remove extra material to allow the angled part to pass through correctly.
One Axis vs. Multiple Axes
Rotating around one axis is the most practical case.
For example, a divider leaning forward or a side panel tilted slightly may still be understandable and cuttable.
Two axes can work in some situations, but the geometry becomes more complex.
Three axes can get weird fast.
At that point, standard finger joints may not be the right choice. The part may still look interesting in 3D, but the joinery may become difficult to cut, difficult to assemble, or just not what you expected.
Rotation May Not Behave the Way You Imagine
3D rotation can be unintuitive.
For example, putting a square box “on its corner” is not as simple as rotating:
X: 45° Y: 45° Z: 45
Rotations stack together, and the order and axis combination matter. A value that feels obvious may not produce the orientation you pictured.
So if a part does not rotate the way you expected, you are not alone. 3D rotation has a habit of making everyone feel briefly suspicious of reality.
Rotating With the On-Screen Tool
Like positioning, rotation includes an on-screen tool.
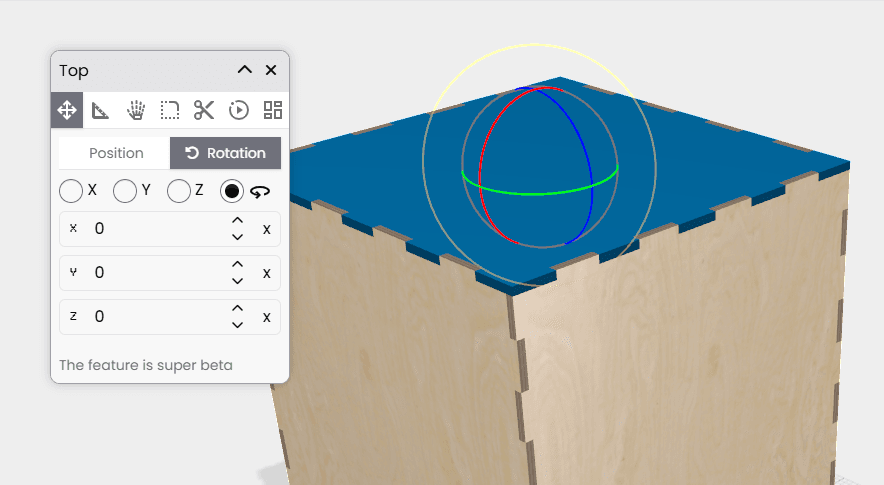
You can drag the rotation handles directly in the 3D view to experiment with the angle. This is often easier than typing values, especially when you are exploring a shape or trying to find a visual position that feels right.
Use the handles when you want to quickly test an idea.
Use the number fields when you need repeatable, exact values.
Practical Guidance
For normal finger-jointed construction:
- One axis of rotation is usually the safest.
- Two axes may work, depending on the design.
- Three axes will often need a different approach.
If rotated finger joints start producing strange openings, remember that GCrafter is trying to make room for a thick angled part passing through another part. The result may be mathematically correct, even if it looks surprising.
The Main Idea
Rotation is great for experimentation and custom shapes.
But the more you rotate a finger-jointed part, the more complicated the joinery becomes. For simple finger joints, keep rotation modest. If you need more extreme angles, you may want to use a different finger style or intersection approach.